How To Create glTF 3D Content in Cinema 4D
The Cinema 4D 3D Modeling, Animation, Rendering Software Suite
Cinema 4D has a very friendly user interface and has been designed in a way to attract beginners and provide them with the comfort of easy learning. At the same time it is an extremely advanced tool that can be used to produce really highly professional results.
This combination of ease of use and powerful results is what makes Cinema 4D a very popular choice in 3D software.
Modeling Software
Modeling software is the program where you define the "bones" of a model by creating the individual units that make up the whole (for example, a 3D cube).
Animation Software
Animation software adds movement and color to your models (for example, giving your cubes eyes or adding color to them).
Rendering Software
Rendering software takes all of your models, animations, and lighting and puts them together into one final product - a .gif, .jpg, glTF, or .mp4 file that can be uploaded to various websites or sent to print.
Cinema 4D is a 3D modeling software designed by the German company Maxon. Maxon has extensively utilized the glTF format.
Starting Out with Cinema 4D:
From a beginners' point of view, for 3D modeling, Cinema 4D has the parametric modeling system. This allows beginners to create a number of basic shapes in an instant. These shapes are very versatile. These shapes can then be pinched and pushed to create custom effects. Moreover, these simple shapes can be utilized to produce objects with complex geometry.
The glTF format is used for describing 3D Scenes. The purpose of developing 3D content in Cinema 4D is to generate such 3D models, scenes, and drawings of any size.
You can describe the scene's geometry using faces, vertices, edges, and combine these into objects. This article will explain the use of the Deformer tool to realize this process using so called spline, box and poly modeling methodologies.
We'll also show you some examples, which will help you understand some of the possible ways to use the tools features.
The Three Basic Methods You Can Use To Create a 3D Model
There are three basic methods for creating a 3D model. If you want to be an artist in the field of 3D modeling, you should be familiar with each technique.
Spline or Patch Modeling
NASA originally developed splines to calculate the trajectories of satellites and rockets. They can emulate numerous curves, but are most commonly used for Bezier curves in computer graphics.
Spline modeling is a mathematical, shape-generation method that uses predefined shapes to create more complex shapes. This kind of modeling is most often used in high-end design applications, such as aeronautical engineering, where precision is critical.
The technique involves using two control points, known as splines, that you can place anywhere on a grid in 3D space. The designer can then use these two points to create any shape between them.
Once the designer has a shape they're happy with, they can use NURBS (non-uniform rational basis splines) to smooth out the transition from point to point. NURBS creates a skeleton of the object covered with a patch of polygons to extend between two splines.
Once all patches have been generated, the designer can add a 3D skin around the shape that smoothes out any imperfections. This results in an accurate, yet flexible, model that you can modify at any time during the creation process.
Box Modeling
The traditional way of creating 3D models is called box modeling. It's similar to how sculptors work with clay. It starts with a primitive shape like a cube or sphere and then adds detail by "slicing" the primitive into pieces, extending the faces of the cube, and so on.
It's a powerful technique, but requires a lot of tweaking of the model. The more you tweak, the more detailed your model becomes. Still, it's also easy to accidentally change its surface topology (the way faces are connected) so that edges become misaligned.
Polygon modeling is an alternative approach that lets you create 3D models by drawing lines between vertices in the mesh. You can draw in 2D and extrude it into 3D space, or you can draw directly into 3D space.
Poly Modeling/Edge Extrusion
Poly modeling creates a 3D model by extruding faces, edges, and vertices.
Unlike box modeling, you can't just start adding edges to the mesh. Poly modeling starts with a single quad (a 3D object consisting of four points) and extrudes an edge of the quad, creating a second quad attached to the first.
From there, you begin extruding edges and creating new quads, face by face. You build up the whole model by putting pieces together until it's complete.
Poly modeling isn't as fast as box modeling and requires less tweaking of the mesh. However, you can plan out the topology for animation ahead of time so that your animation deforms properly.
This type of modeling is generally easier to learn than box modeling and makes a better choice for beginners.
Deformer Tool in Cinema 4D
Deformers are a group of tools that you can use to alter the shape of an object. There are four different types of deformers in Cinema 4D.
The first group is called the basic deformers, including Bend, Bulge, FFD (Free Form Deformation), Lathe, Lattice, Polygonise, Shear, Stretch, Taper, and Twist.
The second group is the Soft Body Dynamics deformers, including Cloth and Soft Body. As you can see with the names of these two groups of deformers, they are pretty much self-explanatory as to what they do and how they work.
Deformers are the key to any 3D modeling package. They allow you to shape, bend, and twist your objects without manipulating their geometry.
Spline Modeling
This section will take a quick look at what spline modeling is.
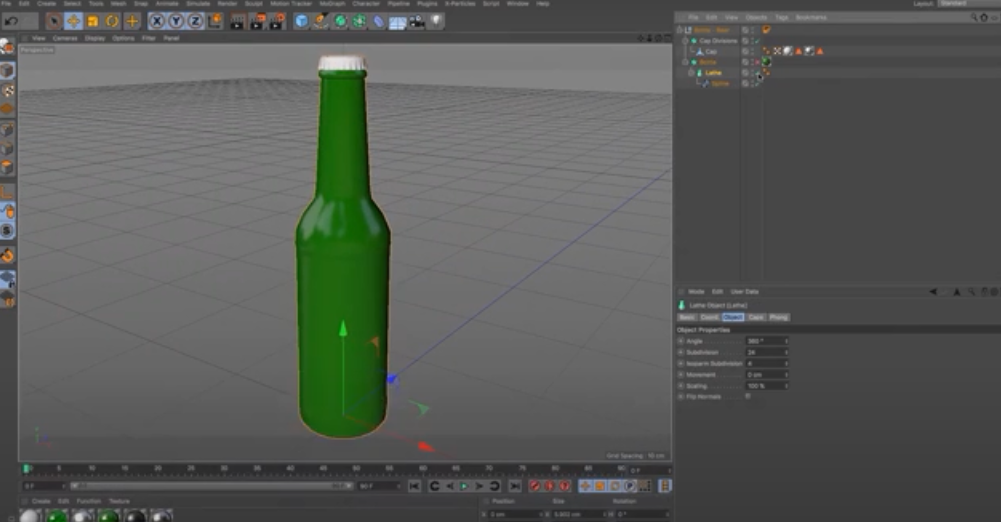
Wine glasses, goblets, and even toothpaste tubes can all be created via this method. Sometimes, you never need to go any further.
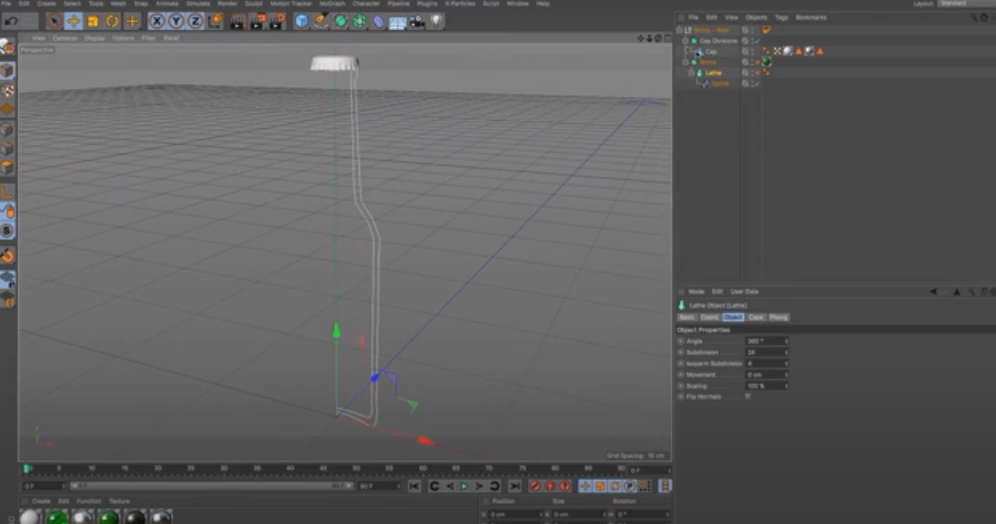
A spline is one of these see-through sorts of lines. To use spline modeling in 3D art, you need a tool that makes splines and a special type of geometry called a generator. The generator will allow you to create your object so it's floating in space.
When you have your object, you can start tweaking it, adding more detail where you want it. You can even take some parts away.
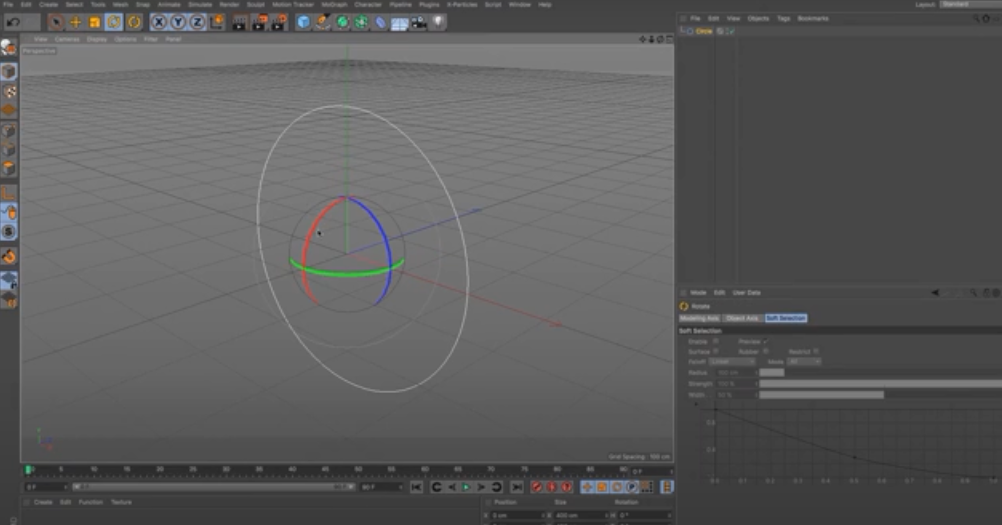
In this instance, we're going to use an extrude. Even so, you could use any tool here—cut, smooth, or whatever else your heart desires!
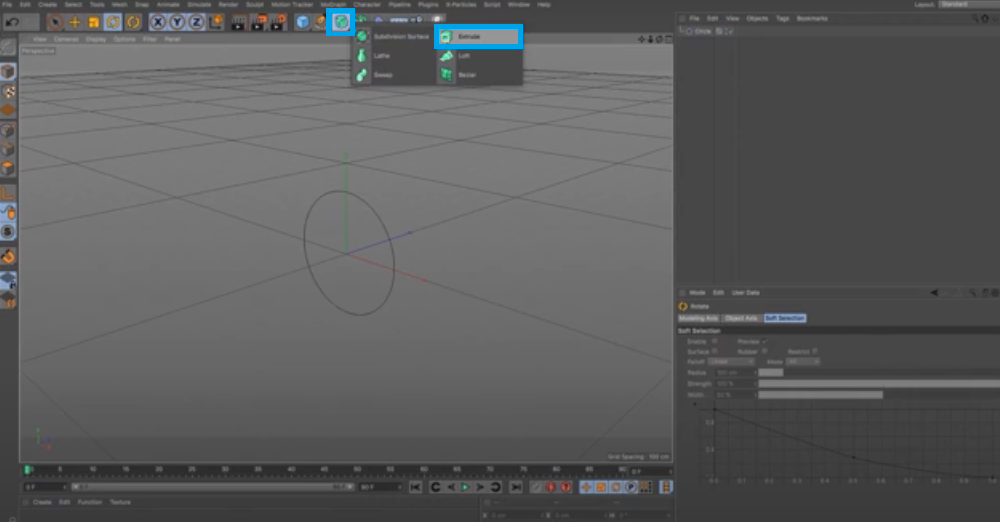
Let's say we have this spline here and we want to make it into a shape that looks like a tube—kind of like a water slide, maybe? We could pull that spline around until it looks like a tube and then delete the rest of the spline.
But that would be time-consuming, and there would be a lot of points and vertices leftover on our object. So instead, we're going to use an extrude.
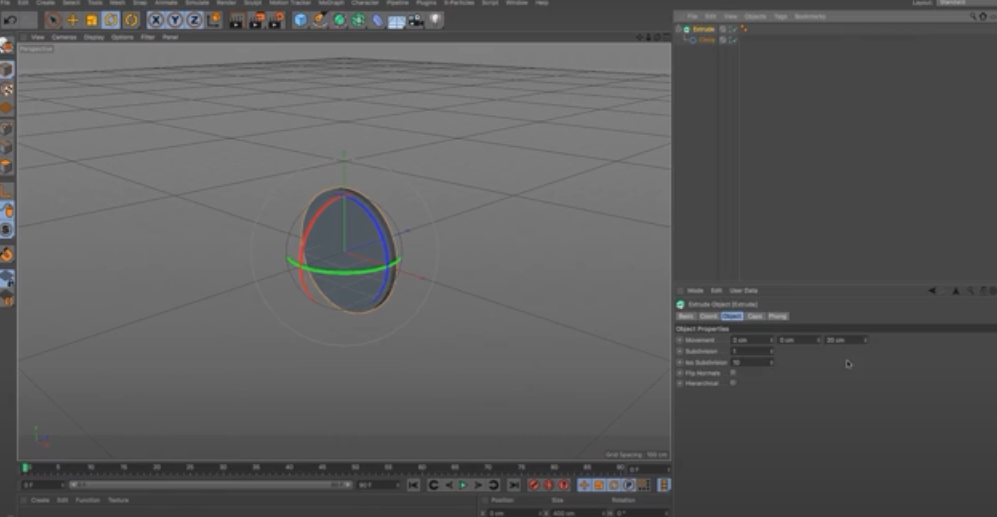
This tool pulls on your spline and makes it into the shape you want while cleaning up all those little extra bits of geometry you don't need.
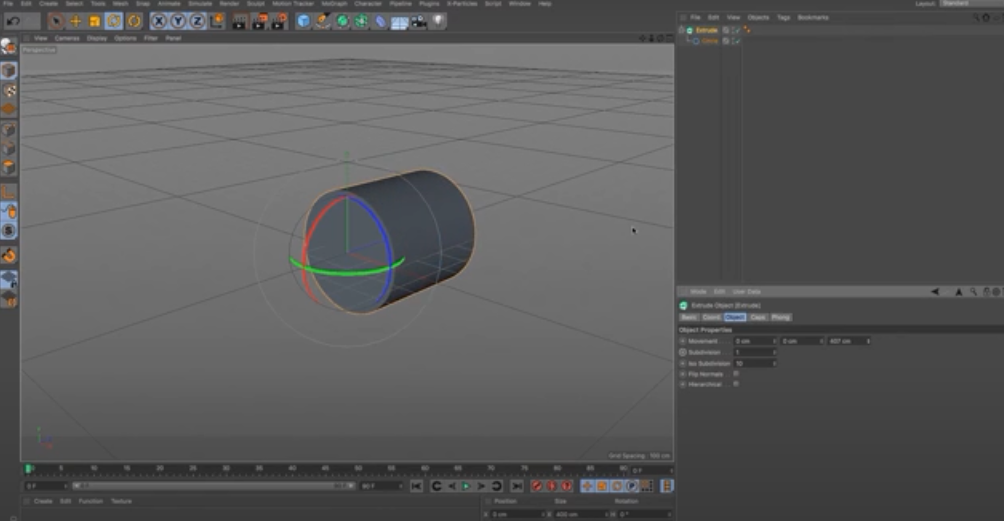
Obviously, with a circle, that's relatively simple to do-you could have used a cylinder too
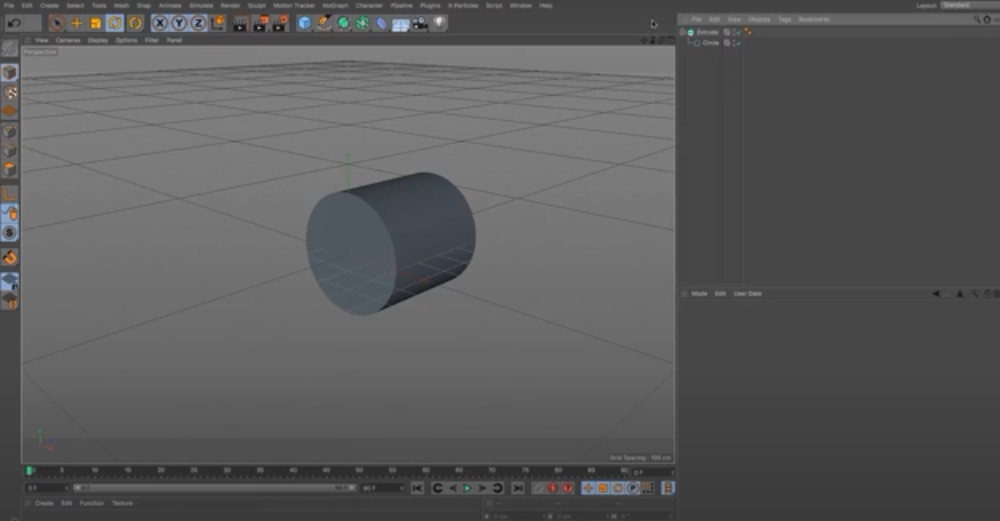
We're going to delete this object and move on to the next shape.
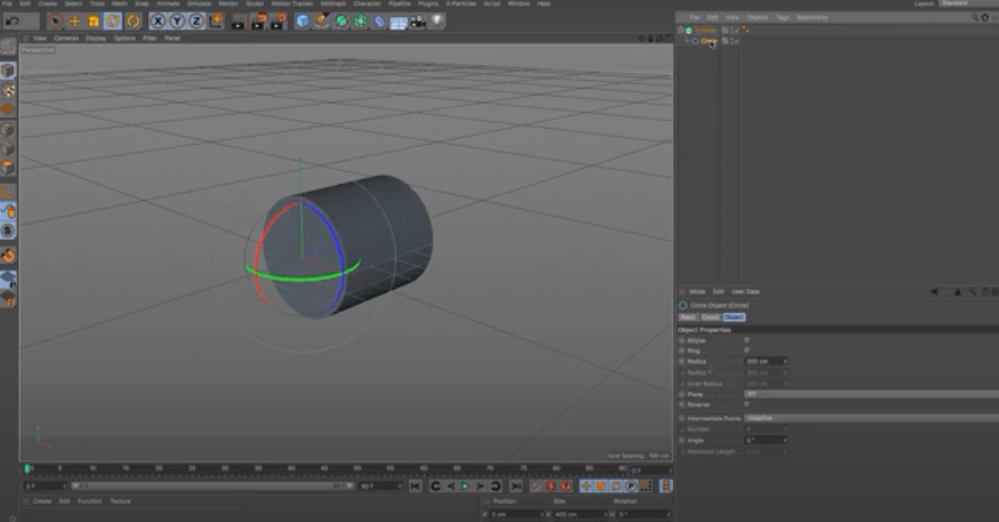
In the next example, we will use a more complex shape.
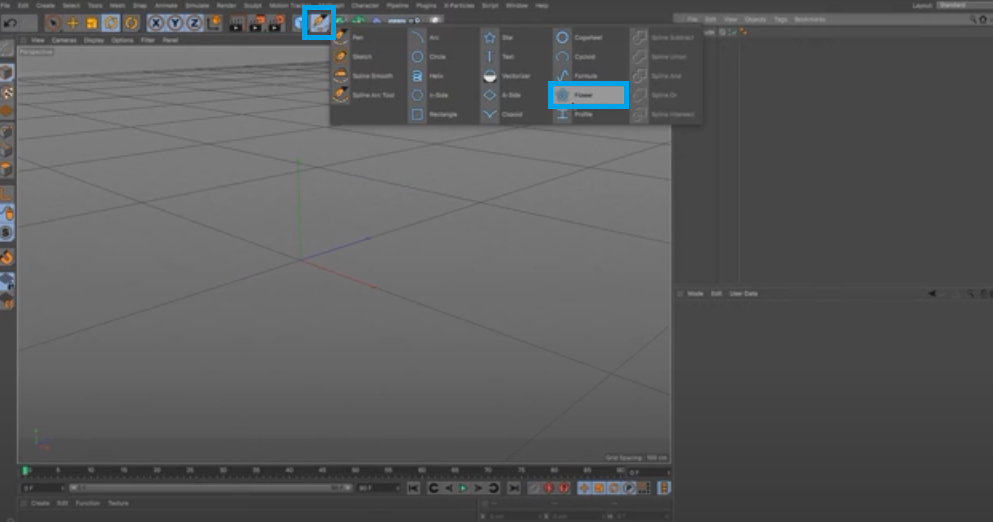
Let's use the flower shape.
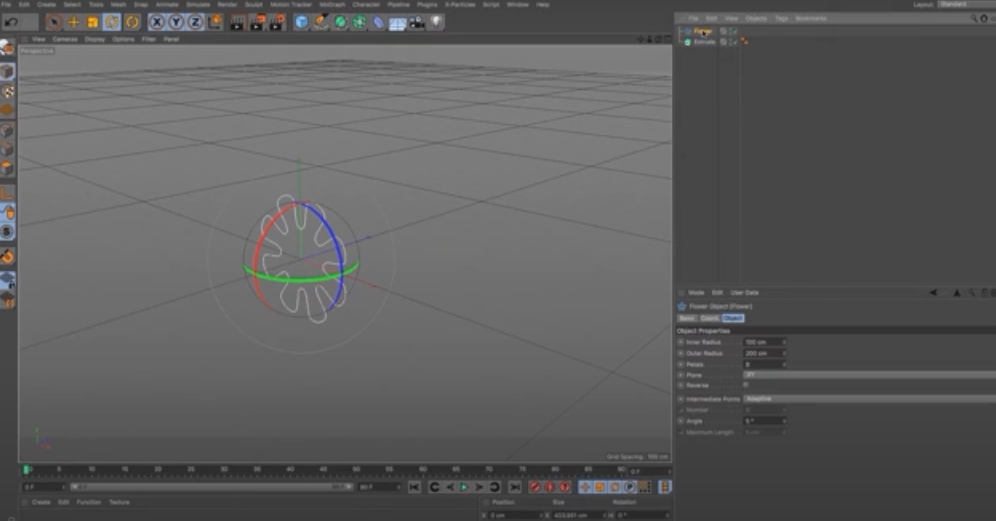
Make that a child of it.
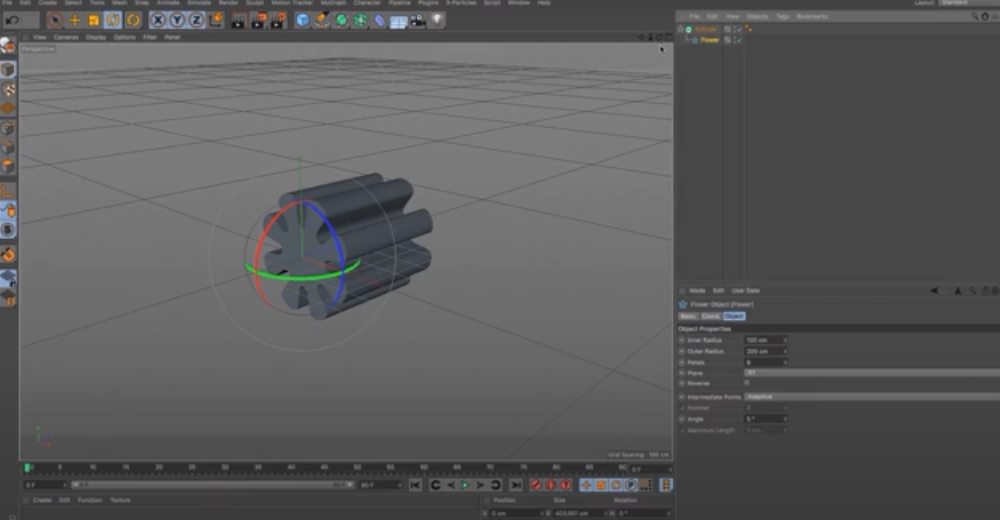
And there we go, we've got a more complicated shape that would have been slightly harder to do. Spline modeling takes a spline and creates a shape out of it.
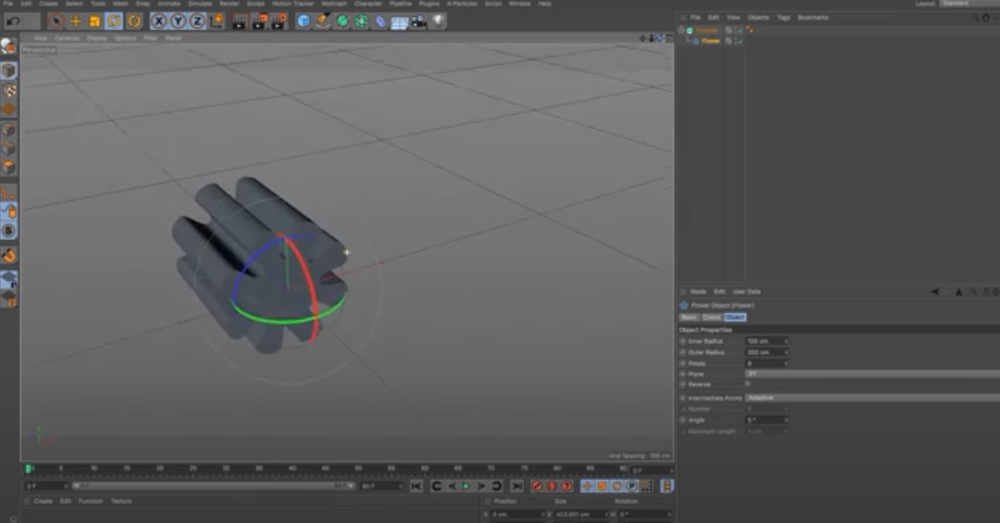
Let's use a different sort of spline.
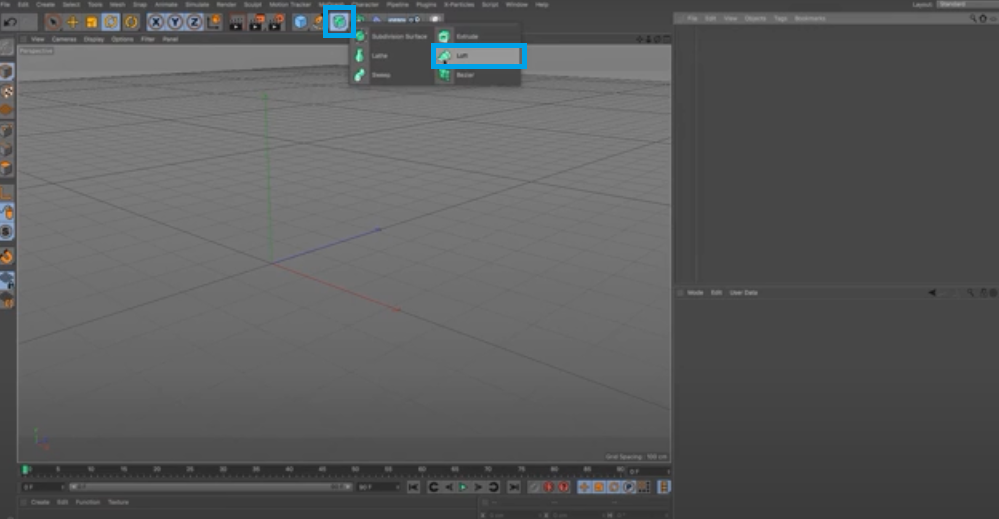
The first thing we'll do is pull out our loft NURBS and start working.
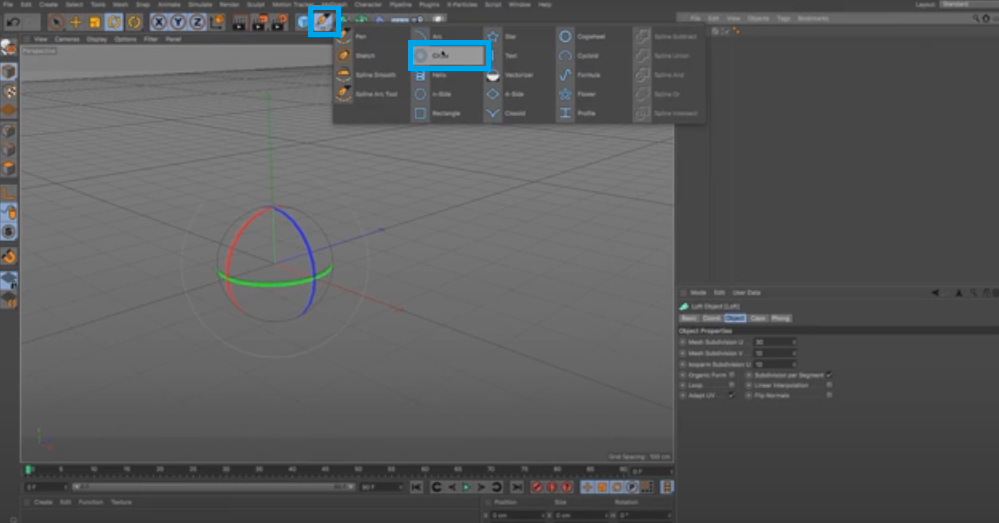
Loft NURBS in Cinema 4D creates a smooth surface by taking two or more different shapes and merging them to form one.
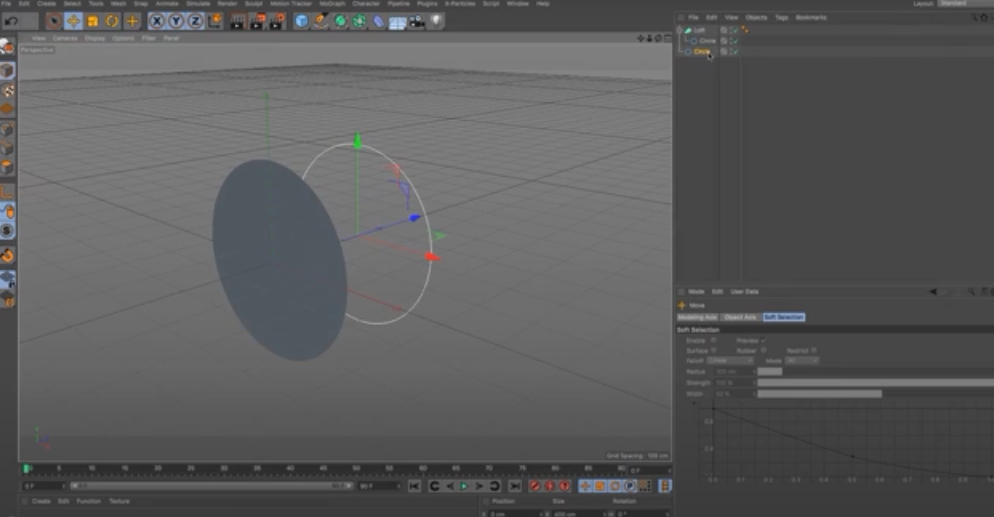
When you merge the shapes, it gives you much control over how they come out. You can see that these anchor points locally control the loft NURBS, so you can adjust them to get a lot of different shapes out of it. You can shrink, move, or change the shapes.

Again, if you use a different spline type, you'll see that you can start to build up shapes quickly.
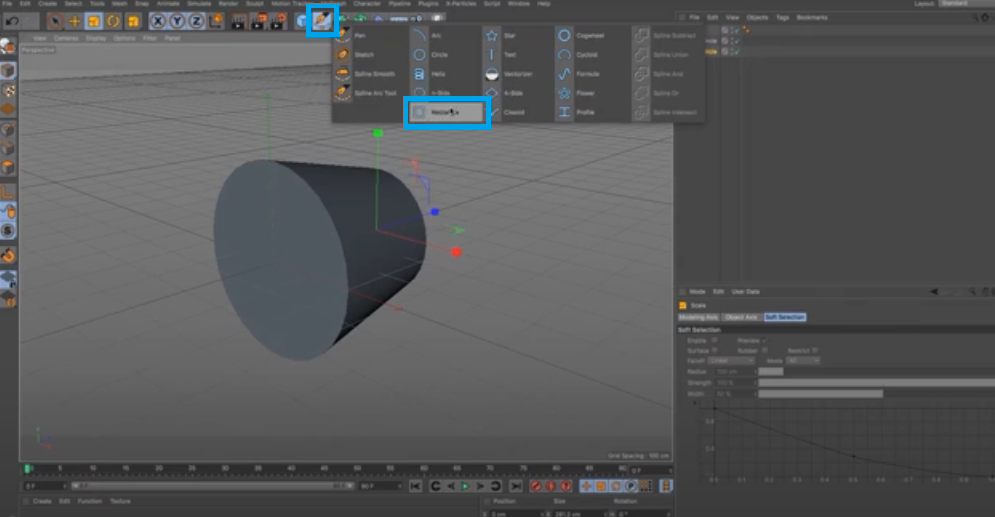
You can create many small pieces and merge them to create one big shape. Let's say that you want to create a model of a house. You could start with a series of cubes. Then, you could use the spline tool to connect them into an outline of the house.
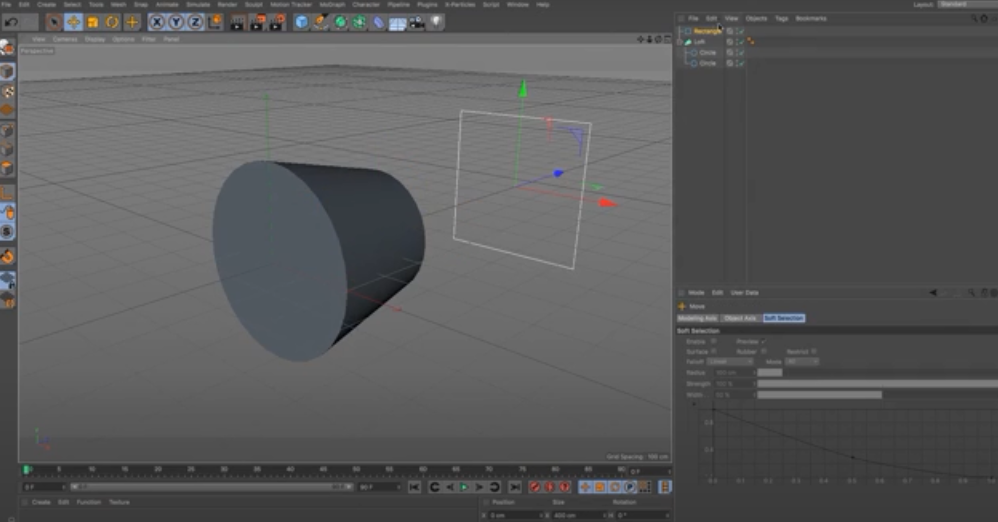
There are two methods that we can use to make a vase:
Deformer
A deformer is an object or tool you can add to an object to change its shape or appearance.
Polygon Modeling
A polygonal model, also known as polygon modeling, is when you create something using polygons (usually triangles) and then fill in the gaps between them with flat colors or textures on the computer.
We'll start with a single polygon and extrude it outwards. Then we will use the Deformer tool to bend that polygon into the right shape and add on more polygons.
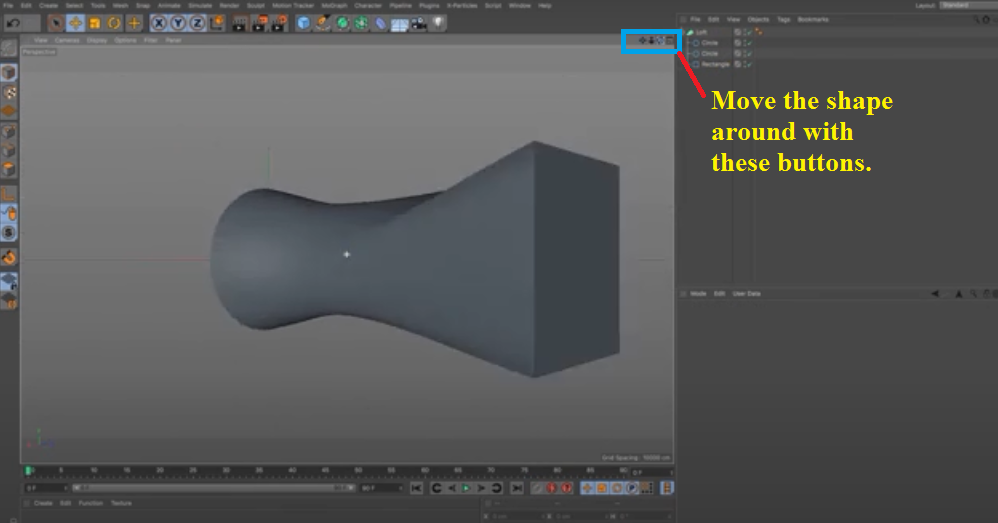
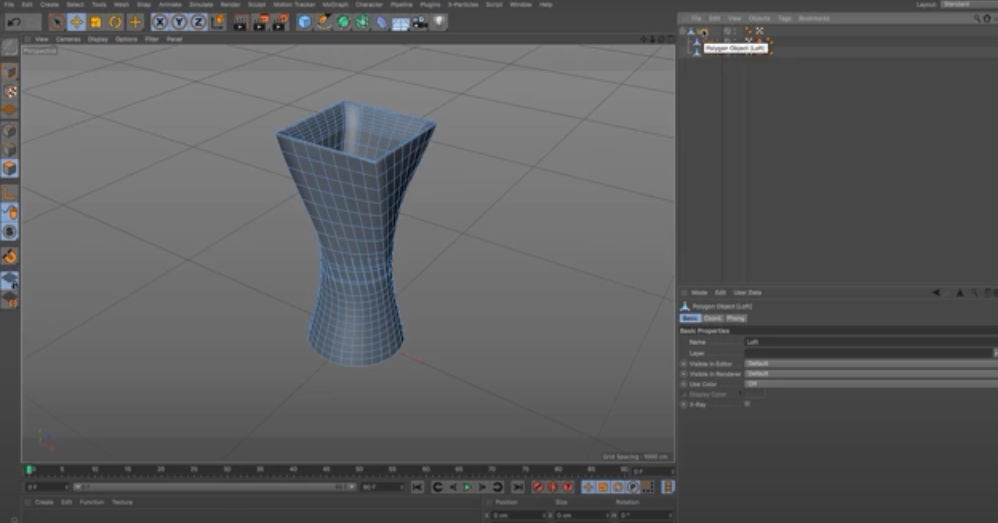
We can get a nice smooth vase using the deformer and polygon modeling methods.
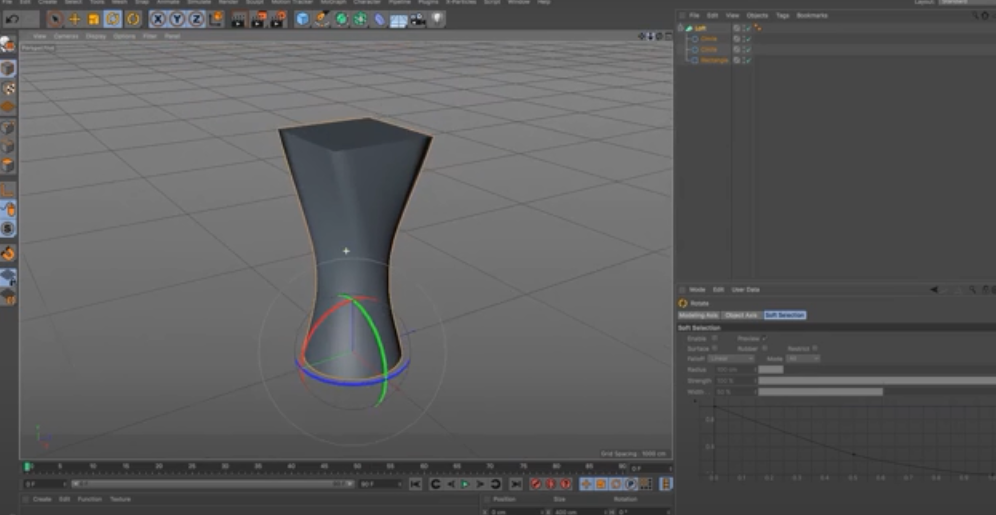
First, take the rectangle tool and draw out a new rectangle on top of the vase. Then, go into the object menu and down to modify > hollow. That will create another rectangle inside the vase. Now, shrink the new rectangle and move it down a bit. Now, your vase is hollow.
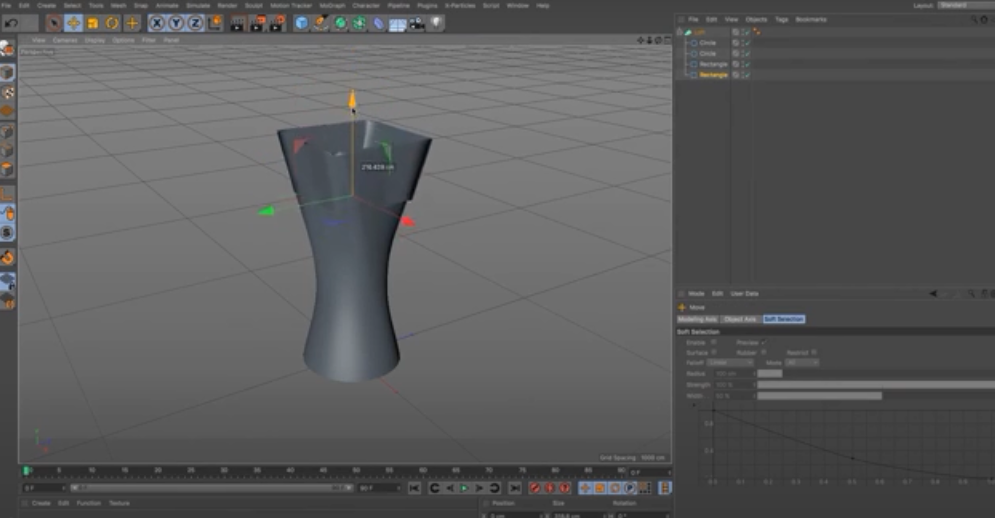
Additionally, we can put a middle circle to the shape on the bottom.
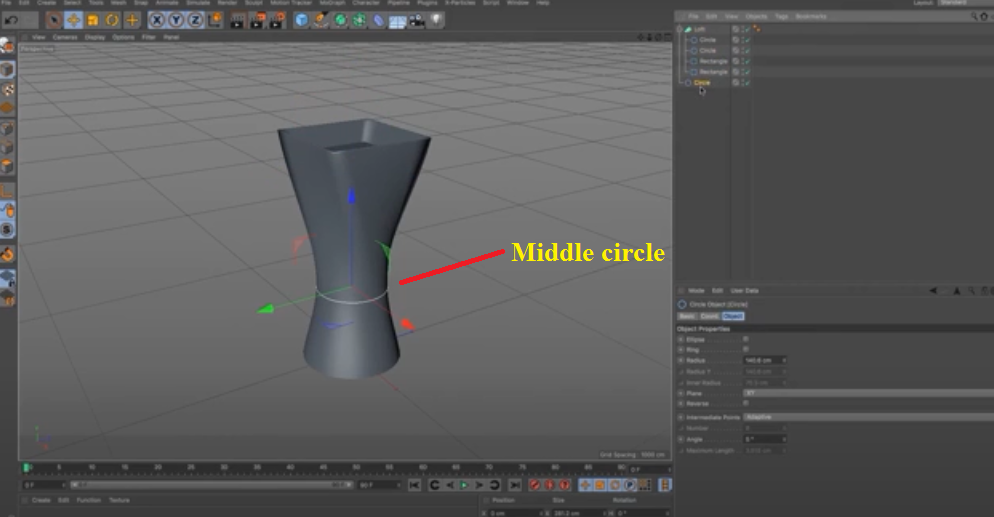
Here, we have the vase that we have just made in no time at all by using the deformer and polygon modeling methods. You can use the controls in the panel on the right-hand side of the screen.
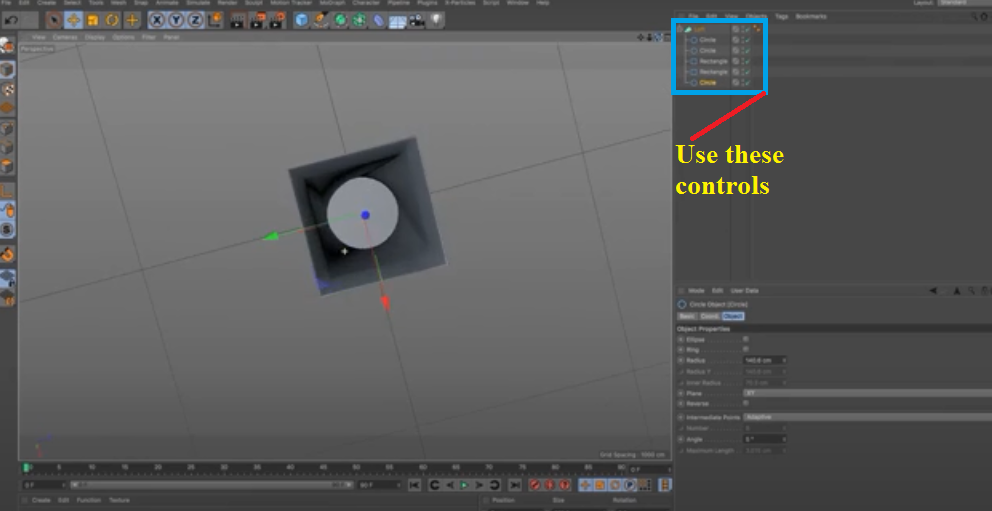
The vase is generated by lofting along the loft nerves, meaning that you can turn stuff on and off or add more and take away as much as you want. You can do this by using the options in the panel on your right hand side.
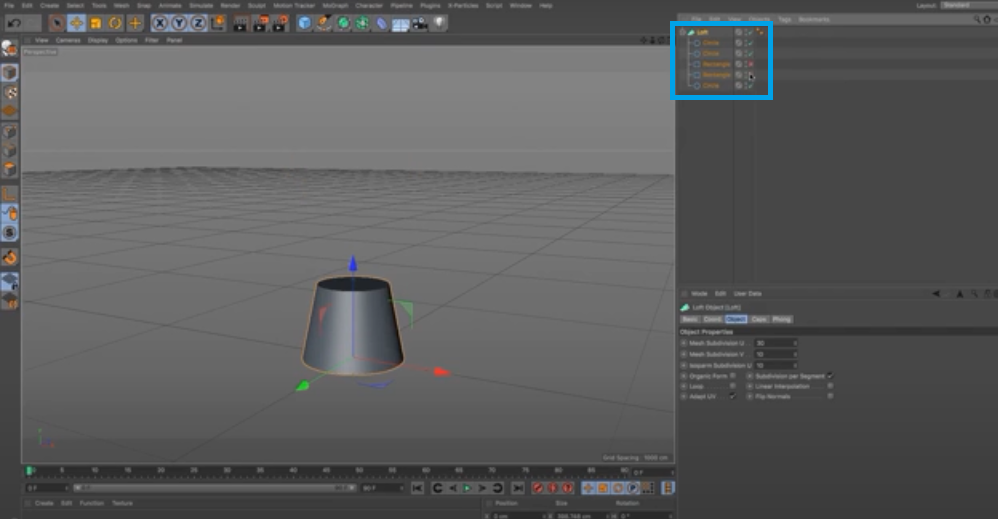
You can move or change anything without making any destructive changes to the vase.
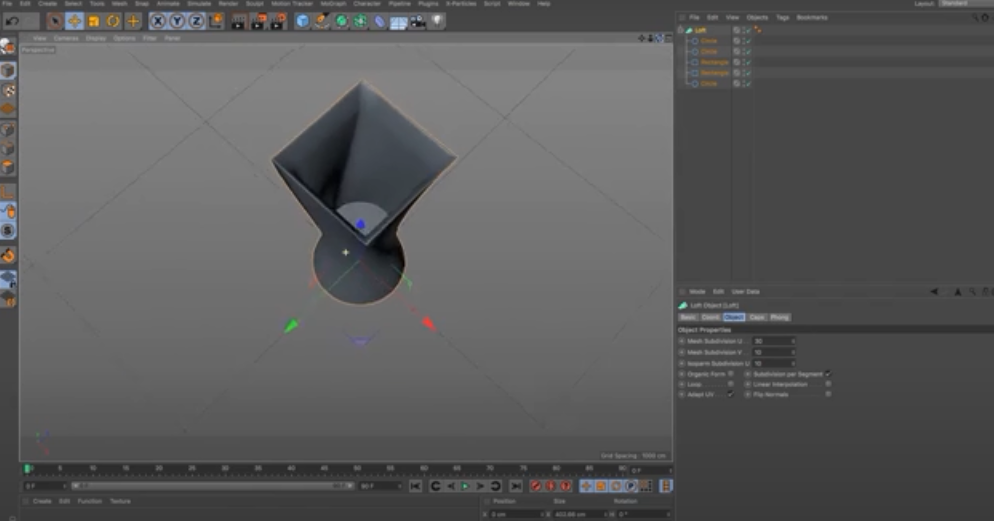
Spline modeling gives us a really quick, easy build-up base because you can make these objects editable. You have access to points, polygons, and vertices.
Points: Points are handy for making simple edits.
Polygons: You can subdivide the polygons in Cinema 4D for more advanced 3D modeling.
Vertices: You can use the vertices to give the object a smoother appearance.
Mesh Topology
You've got a great idea for a 3D model; you want to bring it to life. You've already found the perfect 3D modeling software, but you're not sure how to turn the idea in your head into hard-and-fast geometry.
First off, let's go over what "3D mesh topology" is and how that relates to your model. Mesh topology is the organization of a 3D model's vertices, edges, faces, and polygons. It all starts with the vertices-the points that define each vertex in space.
Next are the edges, the lines that connect each vertex, giving shape to the model. Then there are faces: two or more edges that share a common side-these faces give volume and form to the object being created.
Finally, we have polygons: made up of at least three connected edges or vertices-these are usually referred to as triangles or quadrilaterals (four-sided shapes), but they can also be made up of five or more sides.
Cinema 4D tools for 3D modeling:
There are a few other basic and unique features in Cinema 4D that should be mentioned.
Commander: First we have the commander tool. This is a search tool for finding objects and things from within the Cinema 4D software and user interface. This tool can come quite handy at times and also makes the process of modeling significantly quicker.
Paint Tool: The interesting thing to note about the paint tool of Cinema 4D is that it allows you to paint in individual vertices and points. You can create a custom number of sub divisions in your object to make it easier to paint as well.
Naming Tool: A tool made by Cinema 4D developers to keep things extremely well organized while working on projects in Cinema 4D. This naming tool works for everything from objects to materials. It is an extremely good tool, one you should use regularly because in life, one can never be too organized.
Place Tool: As can be interpreted by the name, this tool allows to place things or objects at places where they have to be placed. Basically, the place tool allows for alignments and rotation of objects as well.
Scatter Tool:This tool allows for objects to be scattered along the stroke of brushes.
Dynamic Place Tool: This tool allows for objects to behave in a dynamic manner for their placement. With a dynamic place tool you can move objects around and scale them together.
Multi-selection: Multi selection is a highly useful tool in various illustration types. This allows for objects to be compiled together and perform action with those objects or on those objects together.
Tween Tool: Although this is an animation tool, it has to be mentioned. The tween tool creates key previous and next frames. Interpolates data in a curve or linearly. It is used to adjust timings and ripples of key frames. These types of animations work well with p3d.in animations, such as in this example: which uses Tween Animations to vibrate the monkey head when you click the head
Pros of Cinema 4D:
There are both pros and cons of using Cinema 4D. These pros and cons in this article were compiled based on the software working of Cinema 4D along with multiple reviews of people that have used Cinema 4D to design 3D models.
- Cinema 4D is an amazingly easy to use tool for making extremely well detailed and powerful 3D art both for offline rendering or for sharing online via p3d.in.
- It is the best tool out there at the moment for beginners.
- A free version available with adobe after effects.
- An extremely fast and powerful rendering engine.
- The smooth textures and materials combined with awesome views to work with brings out great attraction to the models. The models are also easy to optimize for upload to p3d.in once exported into .glb or .gltf
Cons of Cinema 4D:
The only two cons we have found out with Cinema 4D are:
- Cinema 4D crashes under heavy load sometimes, so always save your work and keep saving your progress to not lose your hard worked models.
- It can come off as a little pricey to beginners.
Conclusion
Cinema 4D has a wide variety of tools for modeling your 3D models. It is easy to use for beginners and has very powerful 3D art. Some of the most used tools are Spline and Patch Modeling, Box Modeling and Poly Modeling/Edge Extrusion and there are many more features to perfect your models.
The Deformer tool is a powerful feature of Cinema 4D, allowing you to create artistic distortions and blend objects seamlessly together. The deformer is useful for almost any object.
Games, movies, and especially architectural visualization are just a few areas commonly used. It will take some time to use this tool effectively, but once you do, you'll find yourself using it often in your projects.
Spline Modeling offers a simple and easy way to create a topology optimized for animation in Cinema 4D. The resulting animation can then be displayed on p3d.in and controlled via hotspot annotations
The resulting glTF (.gltf or .glb files) provides an easy way for uploading your content to p3d.in for easy sharing, web embedding or otherwise sharing your content with the world. p3d.in also provides easy ways to tweak your glTF model after uploading and you can add camera animations, annotations and other interactive features independently of C4D after upload.